DHCP+TFTP dnsmasq 是一个轻量级的 DNS 转发器和 DHCP 服务器。主要功能:
DNS 转发 :dnsmasq 可以作为 DNS 服务器,将 DNS 请求转发到上游 DNS 服务器,并将结果缓存以提高解析速度。
DHCP 服务 :dnsmasq 可以提供 DHCP 服务,为网络中的设备分配 IP 地址、子网掩码、网关和 DNS 服务器等信息。
TFTP 服务 :dnsmasq 可以提供简单的 TFTP 服务,用于文件传输。
yum安装 1 2 3 4 5
配置
配置文件地址 /etc/dnsmasq.conf
1
2
3
4
5
interface 指定DHCP和DNS服务监听的网络接口
dhcp-range 定义DHCP 地址池的范围和租约
dhcp-option 3 表示设置默认网关
dhcp-authoritative dnsmasq将覆盖网络中其他 DHCP 服务器的配置
1 2 3 port=53
port DNS服务监听的端口号
dhcp-option 6 表示设置DNS服务器
address 配置域名解析
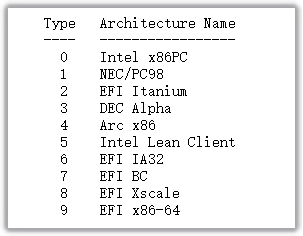
用于pxe引导服务,根据客户端发送的DHCP标志,设置标签。 客户端不同的架构会使用相应的标签
RFC 4578
1 2 3 4 5 6 7 8 9 10 11 12 13 14 15 16 17 18 19 dhcp-match=set :ipxe,175set :bios,option:client-arch,0set :ia32-efi,option:client-arch,6set :x64-efi,option:client-arch,7set :x64-efi,option:client-arch,9set :arm64-efi,option:client-arch,11
1 2 enable-tftp
tftp-root tftp根目录
1 2 log-queries
log目录
dnsmasq启动之后,为eth1所在内网环境同时提供DHCH、TFTP和DNS服务。内网机器启动后将自动分配192.168.100.50,192.168.100.150之间的IP地址。同时访问boot.erhuoyan.com将被解析到192.168.100.2,用于HTTP访问。
HTTP
使用nginx提供HTTP文件服务
安装 配置
/etc/nginx/nginx.conf
1 2 3 4 5 6 7 8 9 10 11 12 13 14 15 16 17 18 19 20 21 22 23 24 25 26 27 28 29 30 31 32 33 34 35 36 37 user root;'$remote_addr - $remote_user [$time_local] "$request" ' '$status $body_bytes_sent "$http_referer" ' '"$http_user_agent" "$http_x_forwarded_for"' ;
ipxe iPXE 是一个开源的网络启动固件,它扩展了传统 PXE 的功能,提供了更多的网络启动选项和功能。iPXE 可以用于从网络启动操作系统、运行虚拟机、访问网络存储等。支持定制化编译,diy启动固件。
ipxe
官方固件
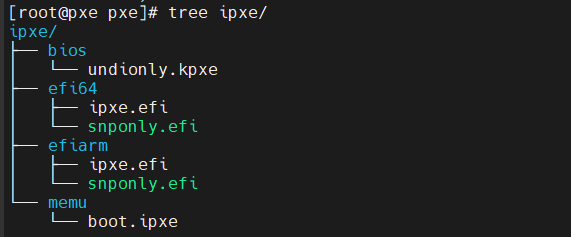
undionly.kpxe bios引导固件
snponly.efi ipxe.efi uefi引导固件
官方有arm64引导固件 因为暂时没有arm环境没有测试
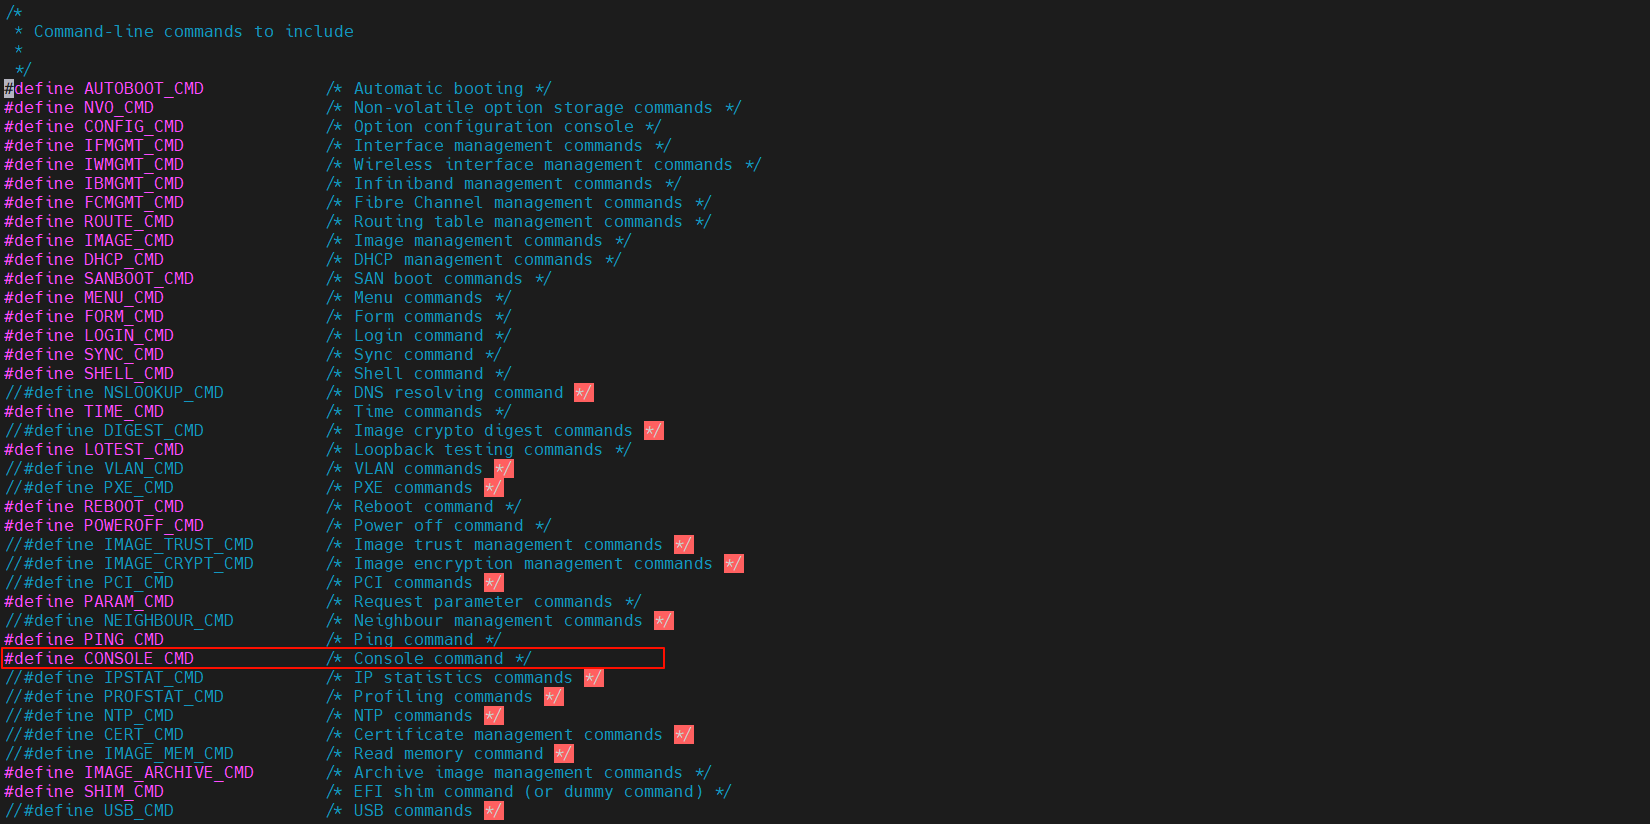
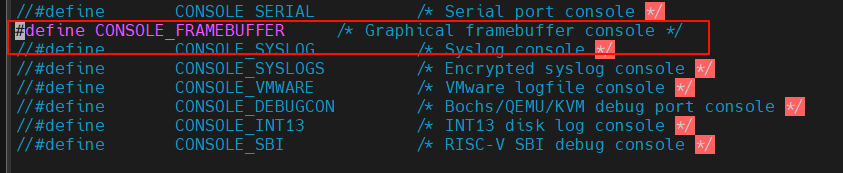
官方编译的固件不支持console命令,无法定制启动console背景和分辨率等,可手动编译
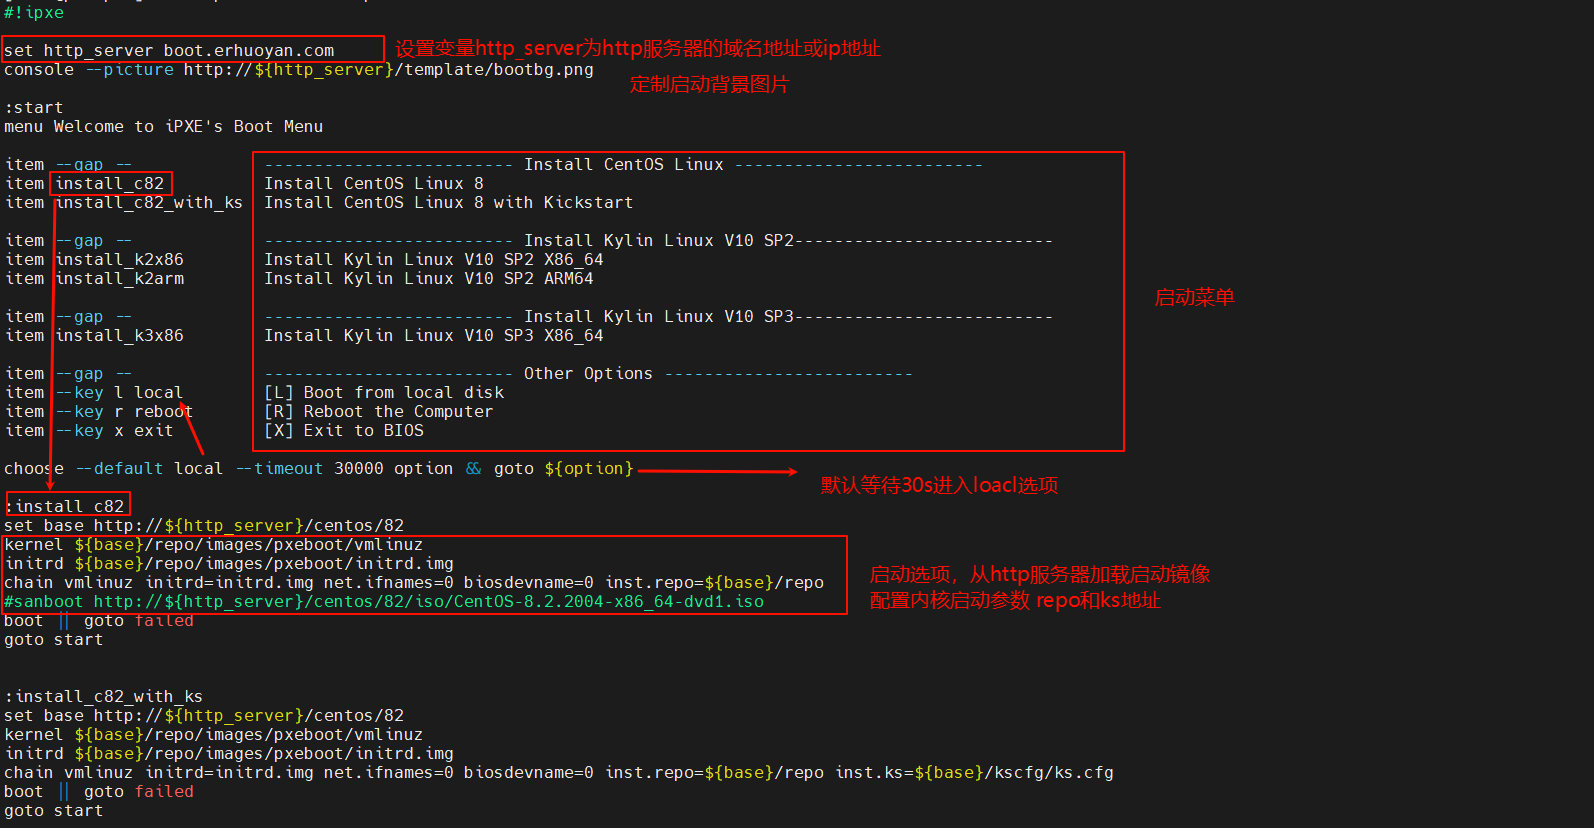
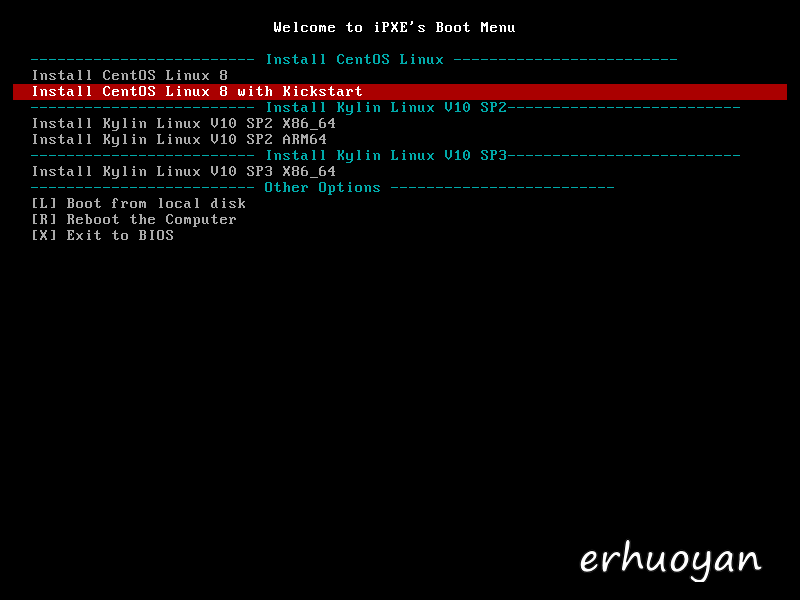
boot.ipxe ipxe的启动脚本,这里可以配置启动参数和菜单
1 2 3 4 5 6 7 8 9 10 11 12 13 14 15 16 17 18 19 20 21 22 23 24 25 26 27 28 29 30 31 32 33 34 35 36 37 38 39 40 41 42 43 44 45 46 47 48 49 50 51 52 53 54 55 56 57 58 59 60 61 62 63 64 65 66 67 68 69 70 71 72 73 74 75 76 77 78 79 80 set http_server boot.erhuoyan.com${http_server} /template/bootbg.png's Boot Menu item --gap -- ------------------------- Install CentOS Linux ---------------- item install_c82 Install CentOS Linux 8 item install_c82_with_ks Install CentOS Linux 8 with Kickstart item --gap -- ------------------------- Install Kylin Linux V10 SP2---------- item install_k2x86 Install Kylin Linux V10 SP2 X86_64 item install_k2arm Install Kylin Linux V10 SP2 ARM64 item --gap -- ------------------------- Install Kylin Linux V10 SP3---------- item install_k3x86 Install Kylin Linux V10 SP3 X86_64 item --gap -- ------------------------- Other Options ----------------------- item --key l local [L] Boot from local disk item --key r reboot [R] Reboot the Computer item --key x exit [X] Exit to BIOS choose --default local --timeout 30000 option && goto ${option} :install_c82 set base http://${http_server}/centos/82 kernel ${base}/repo/images/pxeboot/vmlinuz initrd ${base}/repo/images/pxeboot/initrd.img chain vmlinuz initrd=initrd.img net.ifnames=0 biosdevname=0 inst.repo=${base}/repo #sanboot http://${http_server}/centos/82/iso/CentOS-8.2.2004-x86_64-dvd1.iso boot || goto failed goto start :install_c82_with_ks set base http://${http_server}/centos/82 kernel ${base}/repo/images/pxeboot/vmlinuz initrd ${base}/repo/images/pxeboot/initrd.img chain vmlinuz initrd=initrd.img net.ifnames=0 biosdevname=0 inst.repo=${base}/repo inst.ks=${base}/kscfg/ks.cfg boot || goto failed goto start :install_k2x86 set base http://${http_server}/kylin/v10sp2_x86 kernel ${base}/repo/images/pxeboot/vmlinuz initrd ${base}/repo/images/pxeboot/initrd.img chain vmlinuz initrd=initrd.img biosdevname=0 net.ifnames=0 inst.repo=${base}/repo inst.ks=${base}/kscfg/ks.cfg boot || goto failed goto start :install_k2arm set base http://${http_server}/kylin/v10sp2_arm64 kernel ${base}/repo/images/pxeboot/vmlinuz initrd ${base}/repo/images/pxeboot/initrd.img chain vmlinuz initrd=initrd.img net.ifnames=0 biosdevname=0 inst.repo=${base}/repo boot || goto failed goto start :install_k3x86 set base http://${http_server}/kylin/v10sp3_x86 kernel ${base}/repo/images/pxeboot/vmlinuz initrd ${base}/repo/images/pxeboot/initrd.img chain vmlinuz initrd=initrd.img net.ifnames=0 biosdevname=0 inst.repo=${base}/repo boot || goto failed goto start :local sanboot --no-describe --drive 0x80 :reboot reboot :exit exit :failed echo Booting failed, dropping to shell goto start
详细脚本参数可参考官方文档ipxe cmd
某些命令官方固件不支持需要编译
kickstart
centos8
1 2 3 4 5 6 7 8 9 10 11 12 13 14 15 16 17 18 19 20 21 22 23 24 25 26 27 28 29 30 31 32 33 34 35 36 37 38 39 40 41 42 43 44 45 46 47 48 49 50 51 52 53 54 55 56 57 58 59 60 61 62 63 64 65 66 67 68 69 70 71 72 73 74 75 76 77 78 79 80 81 82 83 84 85 86 87 88 89 90 91 92 93 94 95 96 97 98 99 100 101 102 103 104 105 106 107 108 109 110 111 112 113 114 115 116 117 118 119 120 121 122 123 124 125 126 127 128 129 text"xfs" --size=1024"vfat" --size=1024"lvmpv" --grow"xfs" --percent=100 --name=root --vgname=vg_root'us' link --bootproto=dhcp --onboot=yes --noipv6 --hostname=node1$9sE5T ..b$RL5rayCC95V .XketRo2640disable "chronyd" enable --reserve-mb='auto' "" for disk in $(ls /sys/block | grep sd); do cat /sys/block/$disk /size)512 / 1024 / 1024 / 1024 )) if [ $diff -lt 0 ]; then fi if [ $diff -lt $best_diff ]; then $diff $disk fi done echo "Selected disk: /dev/$best_disk " echo bootloader --location=mbr --driveorder=$best_disk >> /tmp/partation.ksecho ignoredisk --only-use=$best_disk >> /tmp/partation.ksecho clearpart --all --initlabel >> /tmp/partation.ksmkdir -p /localrepo'index.html*' -P /localrepo http://boot.erhuoyan.com/centos/82/repo/echo > /etc/motd && echo > /etc/issue && echo > /etc/issue.netmkdir -p /etc/yum.repos.d/bakmv /etc/yum.repos.d/*.repo /etc/yum.repos.d/bak/cat > /etc/yum.repos.d/local.repo <<EOF [AppStream] name=AppStream baseurl=file:///localrepo/AppStream enabled=1 gpgcheck=0 [BaseOS] name=BaseOS baseurl=file:///localrepo/BaseOS enabled=1 gpgcheck=0 EOF
编译支持自定义背景 参考
1 dnf install gcc binutils make perl xz-devel mtools genisoimage syslinux -y
1 git clone https://github.com/ipxe/ipxe.git
仅支持png格式图片
在src目录下执行
1 2 3 4
在x86机器上编译arm固件需要交叉编译环境
gcc-linaro-11.3.1-2022.06-x86_64_aarch64-linux-gnu.tar.xz
下载解压后添加到环境变量
1 2 3 4 export PATH=/opt/linaro/bin:$PATH
迁移
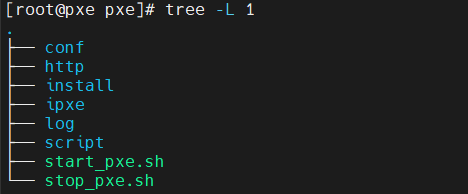
打包的根目录为/pxe,其他机器上安装也在该目录
目录结构
log 日志目录
script 脚本工具
start_pxe.sh stop_pxe.sh 启动和停止脚本。自动执行挂载iso、启动dnsmasq和caddy
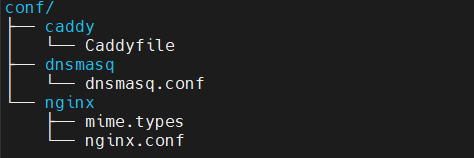
配置文件目录
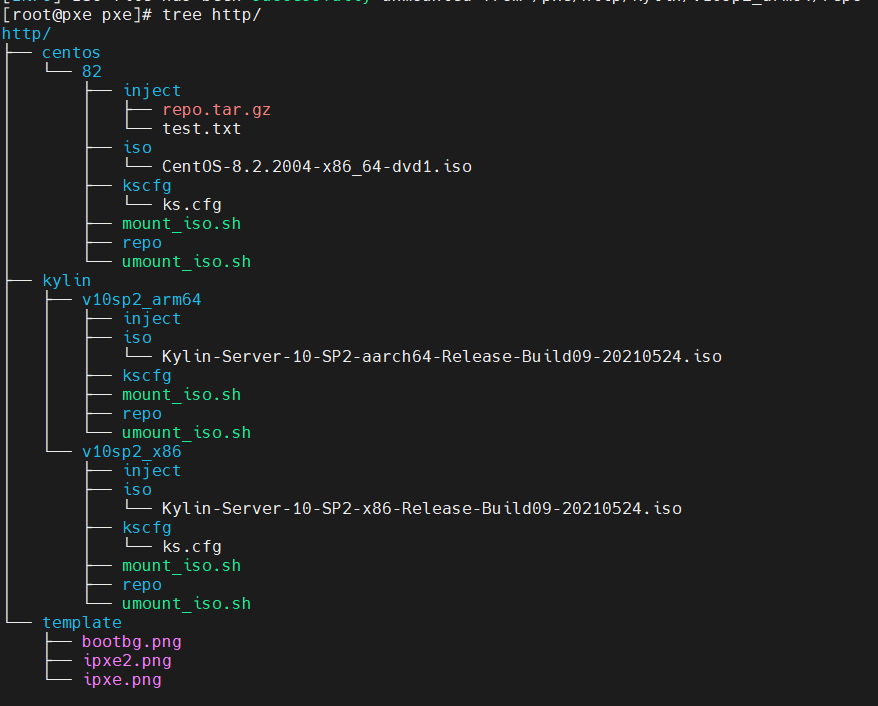
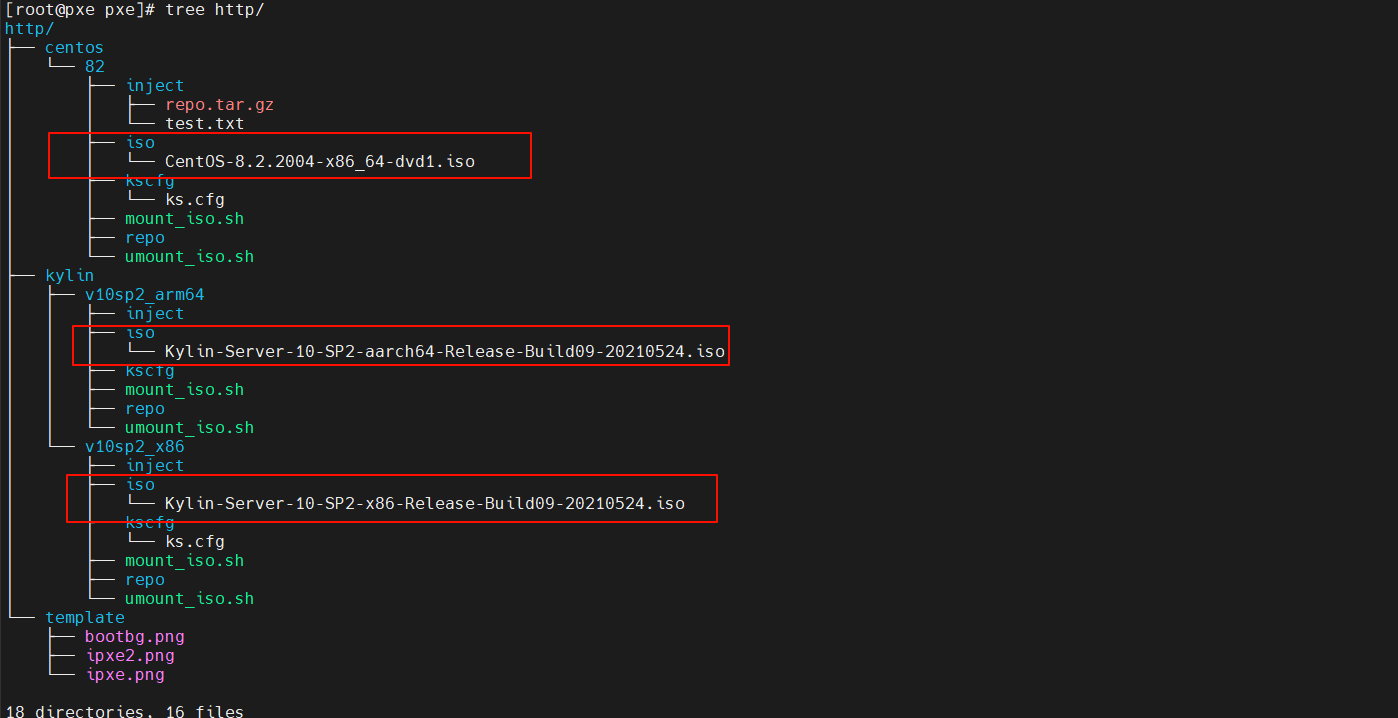
http 文件服务器根目录
iso 存放iso镜像文件
repo iso挂载点
kscfg ks文件地址
inject 需要传入操作系统的文件,在ks文件中wegt获取
mount_iso.sh umount_iso.sh 挂载卸载脚本
可执行文件
TFTP根目录所指路径/pxe/ipxe就是这里
boot.ipxe 是引导菜单
dnsmasq
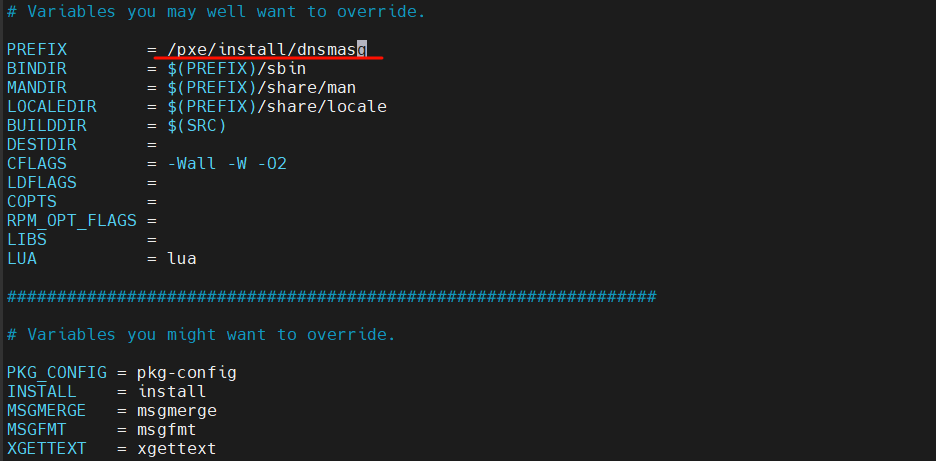
dnsmasq-2.90.tar.gz
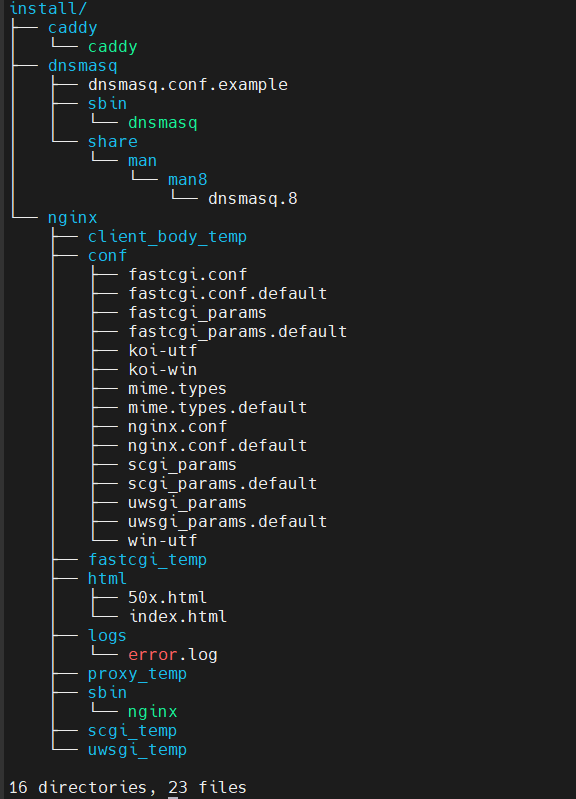
指定安装位置
/pxe/conf/dnsmasq/dnsmasq.conf
1 2 3 4 5 6 7 8 9 10 11 12 13 14 15 16 17 18 19 20 21 22 23 24 25 26 27 28 29 30 31 32 33 34 35 36 37 38 39 40 set :ipxe,175set :bios,option:client-arch,0set :ia32-efi,option:client-arch,6set :x64-efi,option:client-arch,7set :arm32-efi,option:client-arch,9set :arm64-efi,option:client-arch,11
Caddy
可以选择手动编译nginx,最终选择使用caddy官网可直接下载可执行文件
/pxe/conf/caddy/Caddyfile
1 2 3 4 5 6 7 8 9 10 11 12 13 14 15 16 17 18 19 20 21 22 23 24 25 26 27 28 29 30 31 32 33 34 35 36 {log {log {
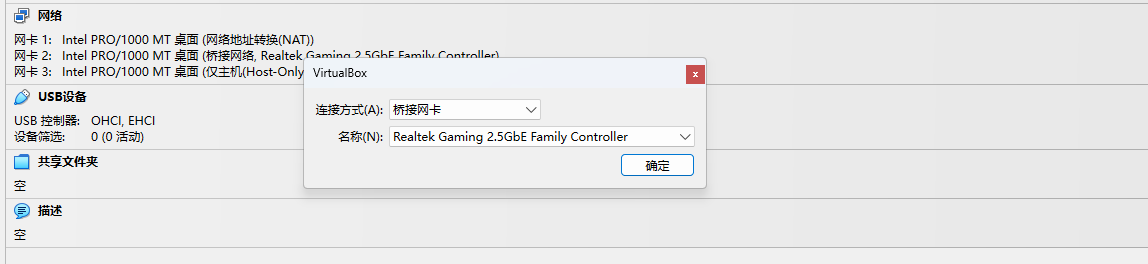
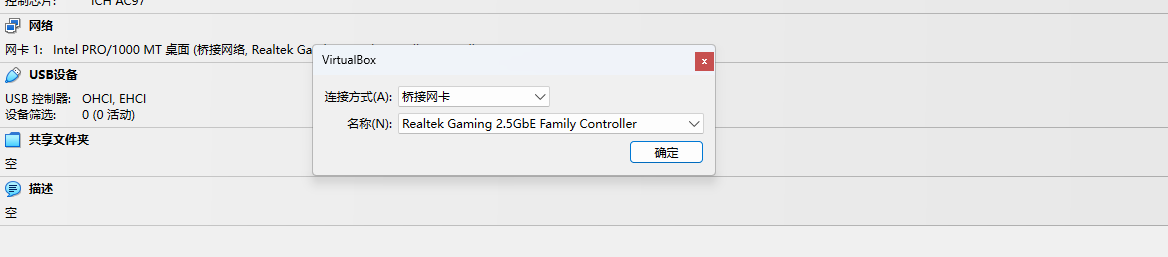
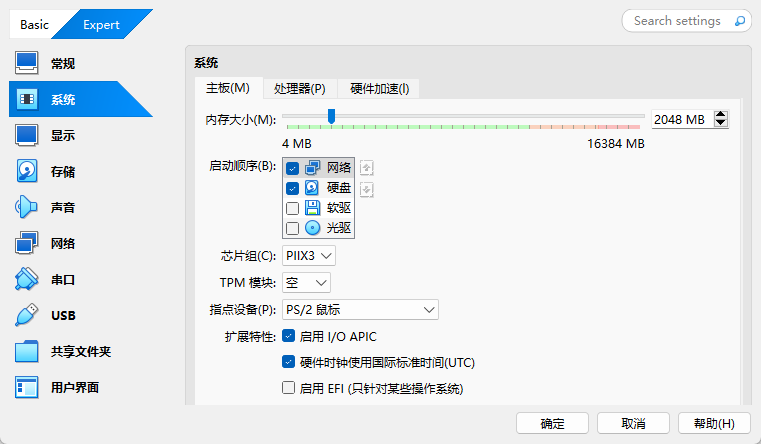
部署 pxe服务端 在vbox中搭建一台pxe服务器
pxe服务的网络接口使用桥接,桥接到本机电脑的板载网口。使用这个网口连接物理机,可以为物理机提供pxe服务。
系统关闭selinux和防火墙!!!
将pxe.tar.gz解压到目标系统/pxe目录
配置dhcp服务器ip,如将eth1配置静态ip192.168.100.2
修改dnsmasq配置文件中的网络接口和ip
打包时会排除iso镜像文件,所以要把iso文件拷贝到相应目录
定制修改boot.ipxe (可选)
定制修改ks.cfg (可选)
执行启动脚本start_pxe.sh
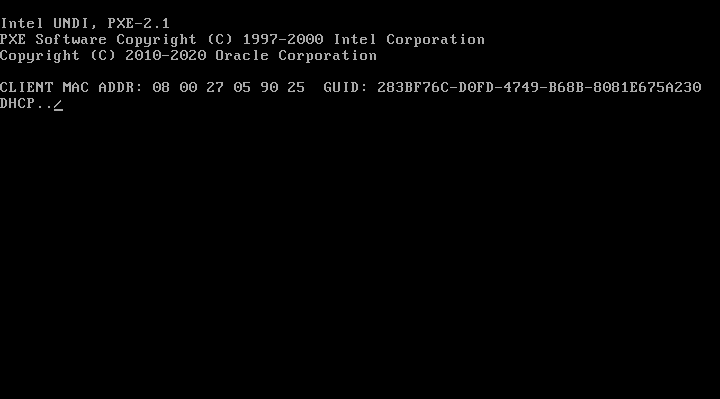
pxe客户端(需要安装系统的机器)
测试